


The great thing about homeownership is that there’s no landlord telling you what you can and can’t do. The not-so-great thing about homeownership is that there’s no landlord to call when things go wrong.
Toilet running off and on, or nonstop? Sink that won’t drain? Door squeaking as ominously as the lid to Dracula’s casket? The cost of fixing these and other relatively minor problems can eat into your budget. Unless, of course, you try fixing them yourself.
To be clear: We’re not suggesting you tackle major plumbing repairs, or re-wire your entire house without knowing the difference between hot and neutral wires. But there’s no reason to shell out the bucks for a new chair if the one you have can be repaired fairly quickly, or to automatically call a plumber when your garbage disposal stops in mid-chew. Think of all the money you might save if it turns out that all you had to do was hit the “reset” button.
Following are some examples of fairly simple fixes that most homeowners will face during their lives. Not only can you likely do them yourself, but you can do so in a matter of minutes (or at least less than an hour). Happy repairing!
1. Fixing a bent miniblind
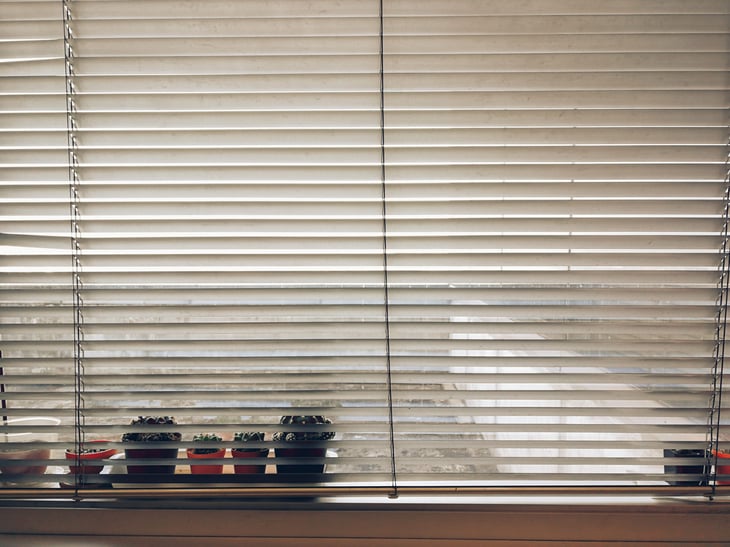
Kids (and cats!) sometimes bend miniblind slats while trying to look outside. According to Family Handyman, an inexpensive little doohickey called the MiniBlindRx can fix things can fix. You slide the palm-sized tool back and forth along the bent slat, crimping it along the way, until it looks acceptable once more.
Several reviewers on Amazon pointed out that the slat doesn’t look completely new, but it’s darned close. “I don’t think your guests would even notice it,” says one cat-owning reviewer. Another reviewer notes that it saved them from having to pay the landlord for damages.
2. Fixing a sticking or squeaky door
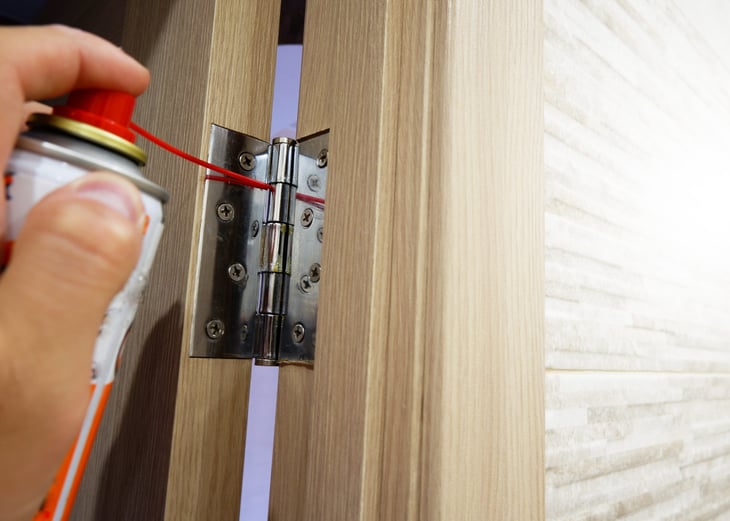
If your door squeaks, it’s often a problem with the hinges. The first thing to do is tighten the screws on the hinge. Open and close the door a couple of times, and if the squeak is gone, your work is done.
Still squeaking? Lubricate the hinges, advises the Angi website (formerly Angie’s List). You might be able to squirt in some WD-40 and call it good. But if the door still squeaks, lightly tapping the door’s hinge pin with a hammer until the pin is lodged upward; spray the hinge and also the pin before tapping it back down into place.
According to Angi, you can also lubricate with a non-glycerin bar soap, olive oil or good old petroleum jelly. And if the door still squeaks? You can try removing the hinge pins and cleaning them with steel wool, but you might also have to replace them. The Angi’s list link explains more.
3. Resolving minor garbage disposal issues
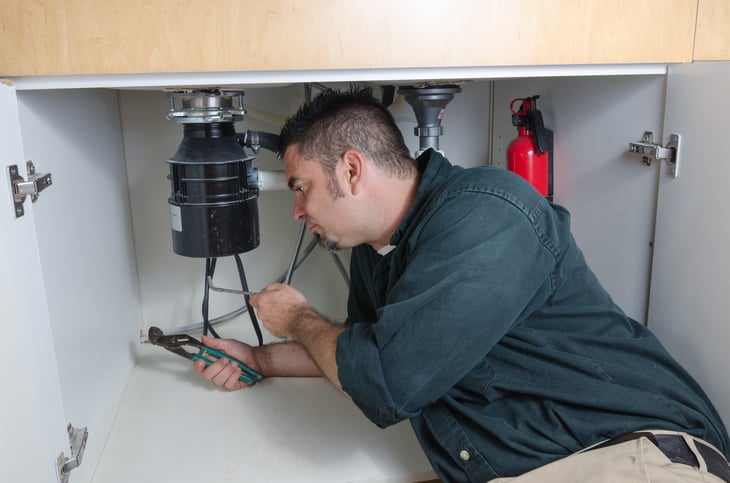
Disposal won’t turn on? Look underneath the unit for the reset button. Push it, wait a few seconds and hit the power switch. Sometimes that’s all it takes, according to Roto-Rooter.
If it still doesn’t work, unplug the disposal and try another outlet; if it works, then you might need to reset the breaker switch for the original outlet.
If the motor is running but the food isn’t getting ground up, there could be a jam. First, make sure to unplug the disposal. Then, use a 1/4-inch hex wrench (aka Allen wrench) in the center hole at the bottom of the unit, and turn back and forth. Typically, that will free up the clog. Don’t have a wrench? Insert a wooden spoon or dowel into the drain, press the spoon/dowel against one of the propeller arms, and then push the arm counterclockwise.
If that doesn’t work, make sure the unit is unplugged and use kitchen tongs or your hand to feel for anything that’s keeping the blades from moving. Roto-Rooter’s “How to Un-Jam a Garbage Disposal Like a Plumber” video offers step-by-step instructions for all these steps.
4. Fixing wobbly chairs

As chairs age, the glue holding them together weakens. Ideally, you should disassemble and re-glue it. But according to Family Handyman, there’s a simpler fix if it’s a chair without much sentimental value:
- Buy some trim-head screws
- Drill pilot holes in the wiggly areas.
- “Toe-screw” the screws into the pilot holes, making sure to drive from the bottom so you won’t be able to see the fix later. (The site shows how.)
If the chair is super wobbly, Family Handyman suggests forcing epoxy adhesive into the gaps to make the fit stronger.
5. Replacing (or installing) weatherstripping

The easiest forms of weatherstripping include self-sticking vinyl or felt strips and door sweeps, available at home improvement centers and big-box stores. You peel and stick them anywhere that air is getting in (or out). Other varieties of weatherstripping must be stapled, nailed or glued in place. The U.S. Department of Energy website offers information and installation tips on most varieties of weatherstripping.
Replacing or adding this product to windows and doors can keep out both wintry drafts and hot summer air, which helps keep you more comfortable and also reduces utility costs.
And speaking of costs: Check to see if you’re eligible for financial aid from the federal Weatherization Assistance Program.
6. Patching drywall holes

A small hole is fairly easy to fix with a drywall repair kit, available online or at home improvement centers. They typically include a 4-by-4-inch patch. These tips from Home Depot should make the job a snap:
Cover the drywall hole with self-adhesive mesh. Using a putty knife, spread the kit’s spackle or joint compound over the hole. Use a criss-cross pattern and try to make the edges blend into the wall.
Let dry for up to 24 hours, then apply a second coat if needed. Once that coat is dry, sand the area until smooth. Next, paint the spot to match the wall. Keep in mind that you might have to repaint the whole wall if the previous paint job was a long time ago and the patched spot stands out.
A larger patch job will likely mean cutting into the wall and adding a new piece of drywall. Home Depot shows how to do that, too.
7. Repairing small tears in window screens
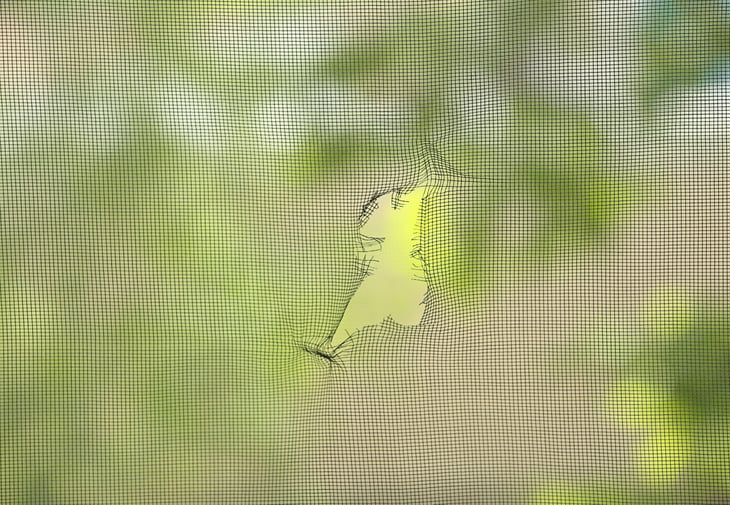
The WikiHow site suggests repairing relatively small holes with clear nail polish. Simply brush it directly over both ends of the tear to “glue” it back together; do this on both sides of the screen. Allow to dry for 24 hours for maximum strength. (Note: For a tinted window screen, look for gray or black nail polish.)
WikiHow also says that you can cut a patch from an old screen and weave it into place, or darn a smaller hole with a needle and aluminum threads pulled from the screen, but that sounds like a lot of work. If you’re up to the challenge, directions can be found here.
Or, take the path of least resistance and patch with screen repair tape, available online or at a home improvement center. Or, consider replacing the whole screen.
8. Unclogging a sink or shower drain

Kitchen sinks are especially prone to clogging due to food residue, cooking oils and mineral buildup. According to the Martha Stewart website, you can loosen a clog with baking soda and vinegar. First, sop out as much standing water as possible; next, dump half a cup of baking soda into the drain and slowly pour in half a cup of vinegar. Cover the drain with a plug or a clean cloth, let sit for half an hour, and then slowly pour a kettle of hot water down the drain. (You can also use this trick proactively, whenever the sink starts draining sluggishly.)
Another simple option is the drain stick, aka drain auger: an inexpensive, flexible plastic strip with sharp barbs inserted into the drain to pull out clogs (especially hair).
Next up is the plumber’s friend, aka the plunger. According to Lowes.com, use a wet cloth to block a sink or tub’s overflow opening; if you’re working with a double sink, block the drain and overflow of the adjacent one. If there’s no standing water in the sink, pour in a few inches of water, which will help force the obstruction out. Work the plunger over the drain hole for up to half a minute, then see if the obstruction is gone.
No luck? An auger cable (drain snake) is your next step. Insert into the drain until you reach the clog, then break it up by twisting, pulling and pushing the auger. In some cases it might be necessary to remove the sink trap and push the auger directly into the drain; if you don’t feel good about doing this, go ahead and call a plumber.
9. Recaulking a tub

This can sound daunting, but it’s a fairly simple fix: Take out the old, squirt in the new. These tips from This Old House will make it easier:
Cover the tub with a drop cloth, then use a razor scraper or utility knife at a low angle to (carefully!) cut off the old caulking.
Use a dry, nonabrasive pad to remove any caulk residue. If it was silicone caulk, use a soft rag moistened with mineral spirits.
To create a straight bead of caulk, position parallel strips of painter’s tape along the areas to be caulked. Make them about three-eighths of an inch apart.
Using steady pressure, apply the caulk along the seam. Next, use a damp lint-free rag or paper towel to press the caulk in so it’s concave.
Carefully remove the tape, making sure you don’t touch the caulk while doing so. Use the damp towel again to eliminate any ridges where the tape had been.
10. Fixing a running toilet

What’s the main source of residential water use? Showers and sinks, right? Or maybe washing machines?
Wrong. According to the U.S. Environmental Protection Agency, toilets account for almost 30% of indoor residential water use. Imagine the waste if a toilet runs intermittently, or won’t stop running at all without repeated handle jiggling.
Depending on the problem, it could be as simple as scrubbing mineral deposits off the toilet tank’s flapper and its seal, making sure the flapper chain is the right length, or replacing the flapper altogether. If water keeps draining into the tank’s overflow tube, making the toilet run off and on, the fix might be as easy as making a slight bend on the float arm.
The This Old House website offers tips on diagnosing exactly what’s wrong with the john. Many fixes are within the grasp of the average homeowner.
Add a Comment
Our Policy: We welcome relevant and respectful comments in order to foster healthy and informative discussions. All other comments may be removed. Comments with links are automatically held for moderation.